
Figure 1: ProPhoto profiled image.
Make sure you have a colour managed image. You can get this from more advanced digital cameras or scanners. If you want to manage an unmanaged image, I would suggest applying the sRGB profile on an RGB image.
Example images can be found in figures 1 and 2. These should look identical on a colour managed system. Since the ProPhoto gamuth (spanned colour space) is larger than sRGB, the image will appear less saturated if rendered as sRGB.
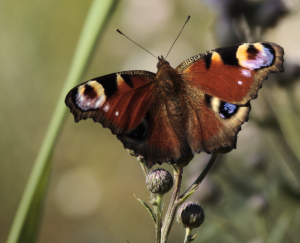
Figure 2: sRGB profiled image.
Load your image into a colour managed program. Under Linux I've found only Scribus to accurately handle colour profiles for both import and export. Under Windows Adobe Photoshop can import managed images and export to managed PDFs.
In Scribus you have to create a document with the size that you want your image to have in your final document. Then import your image into the Scribus document and adjust the size and settings so that it exactly matches the size of the page.
Table 2: Example PDFLaTeX
generated document.